1. Make sure the wood is sanded, clean, and dry.
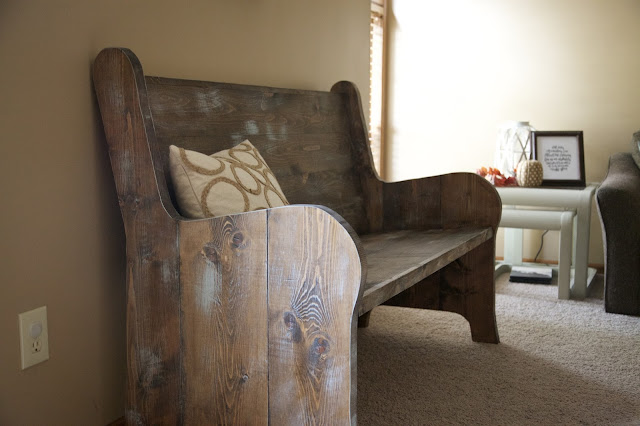
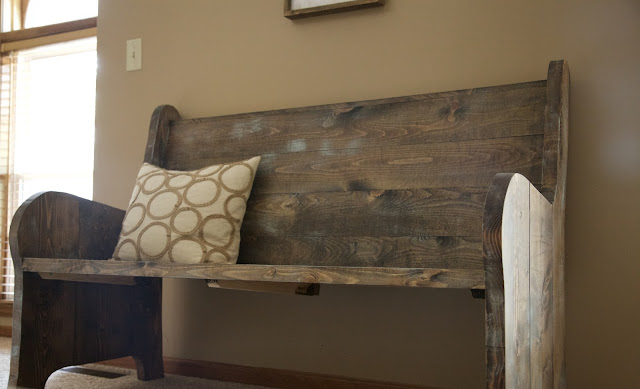
My hubby built me this new beautiful church pew as a surprise gift. I'll demonstrate the process with it, and if you love the pew as much as me, he can actually build you one. Just contact me on Facebook or through the Contact Form for more info on available sizes and pricing! It's my favorite part of the room.2. Choose your stain, apply, and rub off.
I initially thought I wanted to go with white stain for the pew, but decided that I'd rather go with the deep brown stain color that we used for our rustic centerpiece. We chose Minwax Wood Finish Dark Walnut Oil-Based Interior Stain. Just use an older brush to do this, knowing that it won't be of much use for other paints after you use it to stain. Be sure to put down a drop cloth- stain will ruin clothes and carpet. After letting the stain sit for 30+ seconds, depending on how dark you want it, you will need to use a rag to rub off some of the excess stain and build texture. This is very important for the proper rustic look!3. Let the stain dry for a day or two, and choose your favorite chalky finish.
While we let the stain soak, we landed on a dreamy chalky finish from Americana DECOR by DecoArt. The color we chose was "vintage", a pale blue gray. Keep in mind that the chalk paint you choose needs to be lighter than your stain or the current wood color in order to create a rustic look.4. Apply the chalk paint using "dry brushing" strokes.
This is the biggest part of a successful finish- choosing a good brush and using "dry brushing" to not overly apply your chalk paint. Make sure your brush has good bristles and is wide and flat. To dry brush, place just a little bit of paint on a paint can lid or a paper plate. Dip the edge of your brush very gently into the paint, and then dab the brush on a paper towel to remove any extra paint. You need the edge to be "dry" or else you'll end up with big globs of chalk paint that won't look rustic. (Make sure the bristles of the brush are still separated.)
5. Repeat as desired (or use a variation of these steps to paint older wood too!)
Use short, quick brush strokes in a variety of directions, and add a little more paint as you get more comfortable and reach your desired look. If you don't have new wood, you can simply skip to steps three through five, and use a chalky finish to add some texture and color to your wood!That's it! I love how our pew turned out, and I'm excited to "finish" the new kitchen island my husband also built me before Baby K comes in a few months! I love the way that we can make brand new wood look old and full of character. Let me know if you have any questions!
Kelsie


I so need to try this! I'm currently a little painted out from refinished ALL of the nursery furniture, but I may have to find something to distress because I love the look of your pew!
ReplyDeleteYes!! I love distressing stuff!
DeleteThis is a gorgeous piece of furniture, and the rustic finish is beautiful! Pinned!
ReplyDeleteThanks! I'm so happy with how it turned out!
DeleteThis turned out AMAZING! I'm really bad at these sorts of projects, but yours looks great. I think my problem is that I'm not patient enough. lol
ReplyDeleteThank you! It does take patience and is kind of nerve-wracking!
DeleteI love this look! I had no idea it was brand new when I first saw the pictures! You did a great job making this look rustic!
ReplyDeleteThank you! That's the goal!
DeleteThis is beautiful! All of these tips are so helpful! :)
ReplyDeleteThanks Cara!
DeleteThis bench looks amazing! I love seeing all the rustic touches in your home. It motivates me to keep working on mine!
ReplyDeleteThank you, friend! Finishing the nursery next and then I'm dreaming of our bedroom!
DeleteYour bench looks so beautiful! We just bought our first home and I'm excited to actually be able to do more DIY projects.
ReplyDeleteThank you! I love DIY stuff!
DeleteYour bench is gorgeous! I never would have thought to create this type of look until reading your post. So cool! I wish I had something to try this on. :)
ReplyDeleteThanks Crystal! Give it a whirl!
Deletegood post,thank you
ReplyDelete